



Bulk actions
Edit several users in a single operation: message, quick edit, credits, cards, suspension, trash. A well-set filter turns an evening of data entry into one click.
Select several users
- In Administration›Users›User Management, narrow down the list with Filters: subscription, profile, group, age category, status and many other criteria you can combine.
- Tick users one by one, or click Select All to take the entire result of the filter. Deselect All clears the selection in one go.
- Open the Actions menu.
These three controls live in the same bar, together with the selection counter. On a computer, the bar sits to the right of the "Search" field; on a mobile, just below it.

Apply a bulk action
Depending on your permissions, the Actions menu offers:
- Quick Edit: change in one go the profile, the subscription and its dates, its paid or unpaid status, groups, notifications, presence in the directory, the medical certificate, privacy, or reset passwords.
- Send a Message: write a message to the selected users.
- Credits: adjust credit counters in bulk.
- Print Cards: generate personalised cards in PDF format.
- Delete: move users to the trash.
- Suspend and Reactivate: block or reopen access, with an optional reason and notification.
- Flag: add or remove a visual marker to spot the records still to be processed.

For e-mail campaigns with merge fields and delivery tracking, use the dedicated module instead:
Adjust credits in bulk
The Credits action handles Booking Credits and Guest Credits separately: each family has its own choice, and you can leave one on Do nothing while you change the other.
Four operations are available:
- Add / remove credits: each counter changes from its current balance.
- Meter Upgrades: applies the same balance to all selected users.
- Multiply / Divide: converts existing balances, for example when the rates change.
- Convert to Guest Credits (or Convert to booking credits): moves a balance from one family to the other.

An optional note goes with each operation: it appears in the record's history and will save you from having to work out later why an adjustment was made.
Print personalised cards
The Print Cards action generates a high-definition PDF in business card format, 85 × 55 mm.

- Choose a Theme in your organization's colours.
- Under Data to Display, tick what should appear on the card: username and login address, date of birth, licence number, ranking, subscription name and dates, access code.
- Under Options, add the photo, the coloured subscription and profile dots, or your own website address.
- Choose the Guides and Bleeds according to your printing method, then click Generate Cards.
For office printing, keep None. For a professional printer, choose Lost Funds or Bleed + Crop Marks: the margins and crop marks avoid white edges.
Clean up inactive users
A user base grows heavier year after year: former members, sign-ups with no follow-up, accounts created for a training camp. Two well-chosen filters isolate those who no longer use anything, and the bulk action moves them to the trash.
The benefit is not only a tidier list: users placed in the trash no longer count towards your subscription limit. Cleaning up therefore frees up places, without changing plan. And nothing is lost — the trash keeps the records and their history.
Open the filters panel
- Go to Administration›Users›User Management.
- Click Filters, above the list. A panel opens on the right-hand half of the screen, with all the available criteria.
- In the panel's contents, open the Activity section.
The result(s) counter, at the top of the panel, updates each time you choose a criterion. Reset, just beside it, removes every filter so you can start again from scratch.
First set aside recent sign-ups
In the Date Added criterion, choose More than, then the duration: 3, 6 or 12 months.
Apply this filter first, before the inactivity one. Without it, your selection would include the last few weeks' sign-ups: someone who registered ten days ago has not yet booked or opened the application, so they are technically inactive, and you would delete them before their very first visit.
Select inactive users
In the Activity criterion, choose Inactive, then the duration, from 3 to 36 months: for over 12 months, for example.
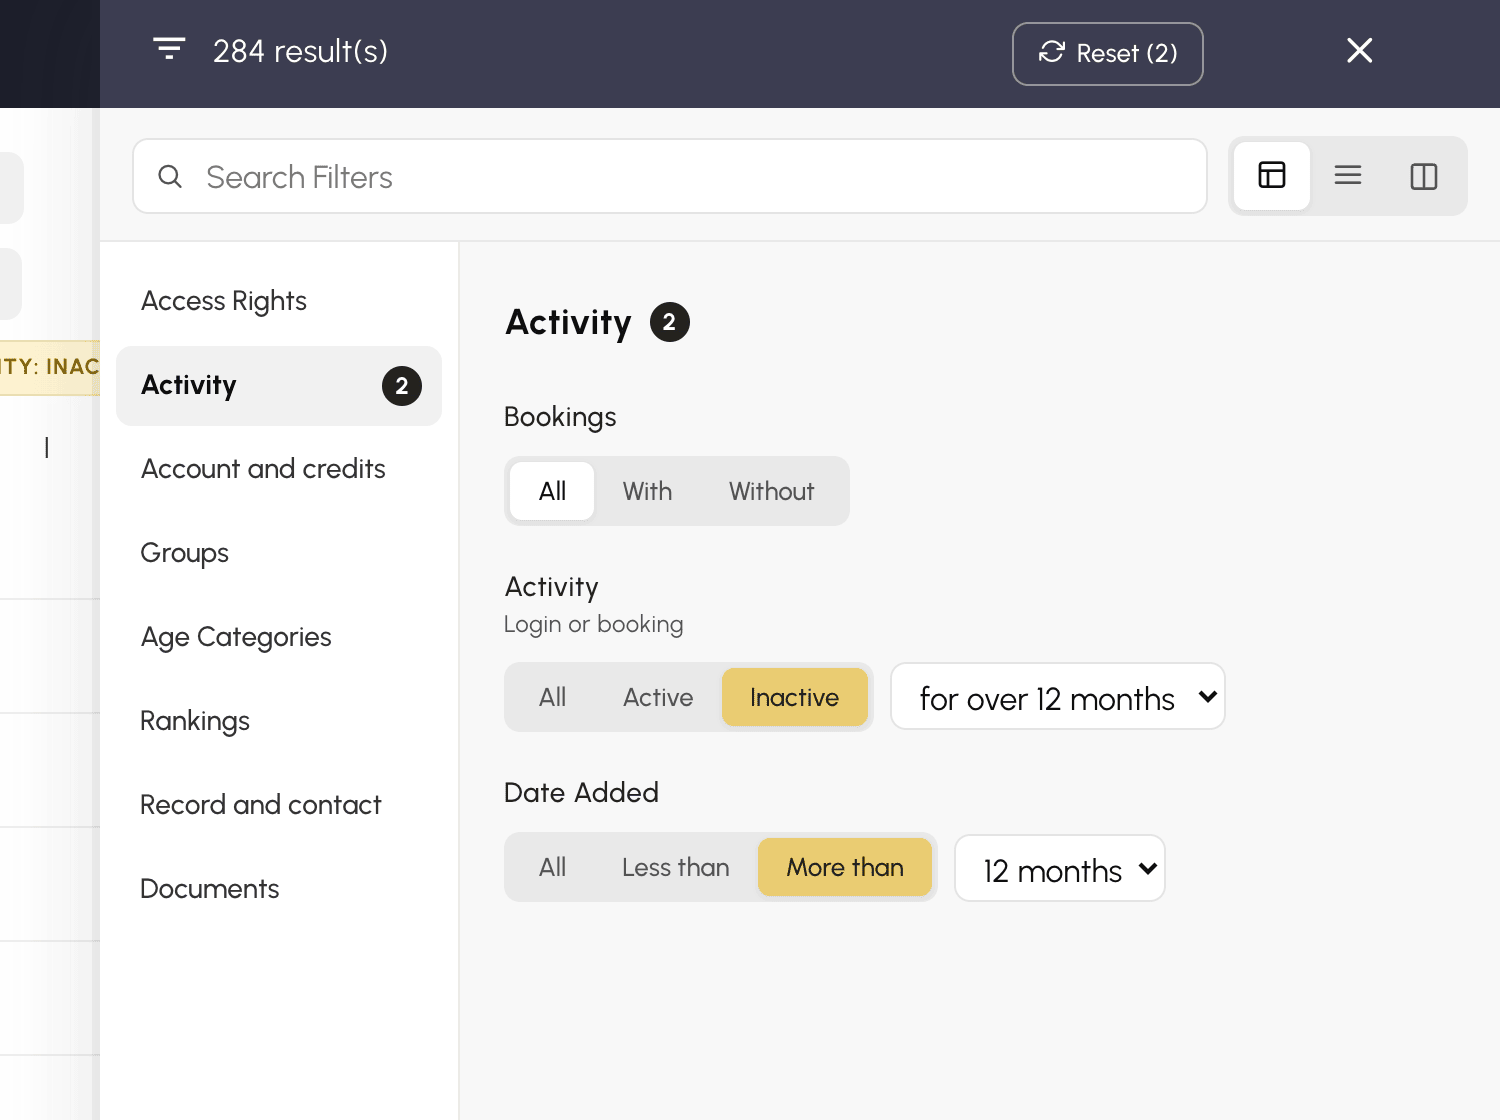
This filter does not only look at logins: it also checks bookings. A member who never logs in but whom their partners add to their time slots will therefore not be counted as inactive, and rightly so: they are playing.
Vary the duration to judge. Twelve months suits an organization with an annual season, twenty-four a venue where people come back now and then. The result(s) counter immediately shows how many records are concerned.
Add other filters
The two previous criteria do not distinguish between populations. Yet you do not clean up in the same way for everyone: add as many criteria as needed, they all combine.
- In the Access Rights section, narrow down to one role: visitors and accounts created for a trial can readily be set aside, coaching staff and board members never.
- In the same section, target a specific subscription, for example an hourly card or a rental subscription that was not renewed.
- The other sections cross-reference in the same way: age category, group, ranking, suspension.
Tick several items in the same list to add them together: two roles ticked keep the people in either one. Different lists, on the other hand, are cumulative: a role and a subscription ticked together only keep the people who match both.
To set a population aside rather than target it, switch the list to Exclude: an Activity leader role ticked in Exclude mode removes activity leaders from the result, whatever their level of activity.
Check, then delete
- Close the panel and go through the resulting list. It sometimes contains cases that no filter can know about — the treasurer who never books, an instructor's administrative account, the contact for a partner local authority.
- Tick the records to delete one by one. If the list suits you as it is, Select All takes the whole filter result, and you then untick the exceptions.
- Open Actions, then Delete.
The records move to the trash, disappear from your lists and stop counting towards your subscription.
