



Creating and managing subscriptions
A subscription brings together the access and booking conditions of a plan: dates, price, booking quota and rules to be followed. Create the subscriptions offered by your organization, then assign each user the one that suits them from their record.
- Creating a subscription
- Organizing the list automatically
- Arranging subscriptions in manual groups
- Adjusting the display and acting on several subscriptions
- Sharing settings with a reference subscription
- Tracking membership fee payments
- Selling the subscription online
- Automatically reminding subscribers before expiry
- Requiring supporting documents in order to book
- Duplicating a subscription for the new season
- Archiving subscriptions that are no longer needed
- Deleting an empty subscription
- Reassigning a subscription in bulk
Creating a subscription
Start with a plan offered by your organization, for example Recreational tennis. You can then assign it to the users concerned, without re-entering the same rules on every record.
- Go to Administration›Users›Access Rights›Subscriptions and click New.
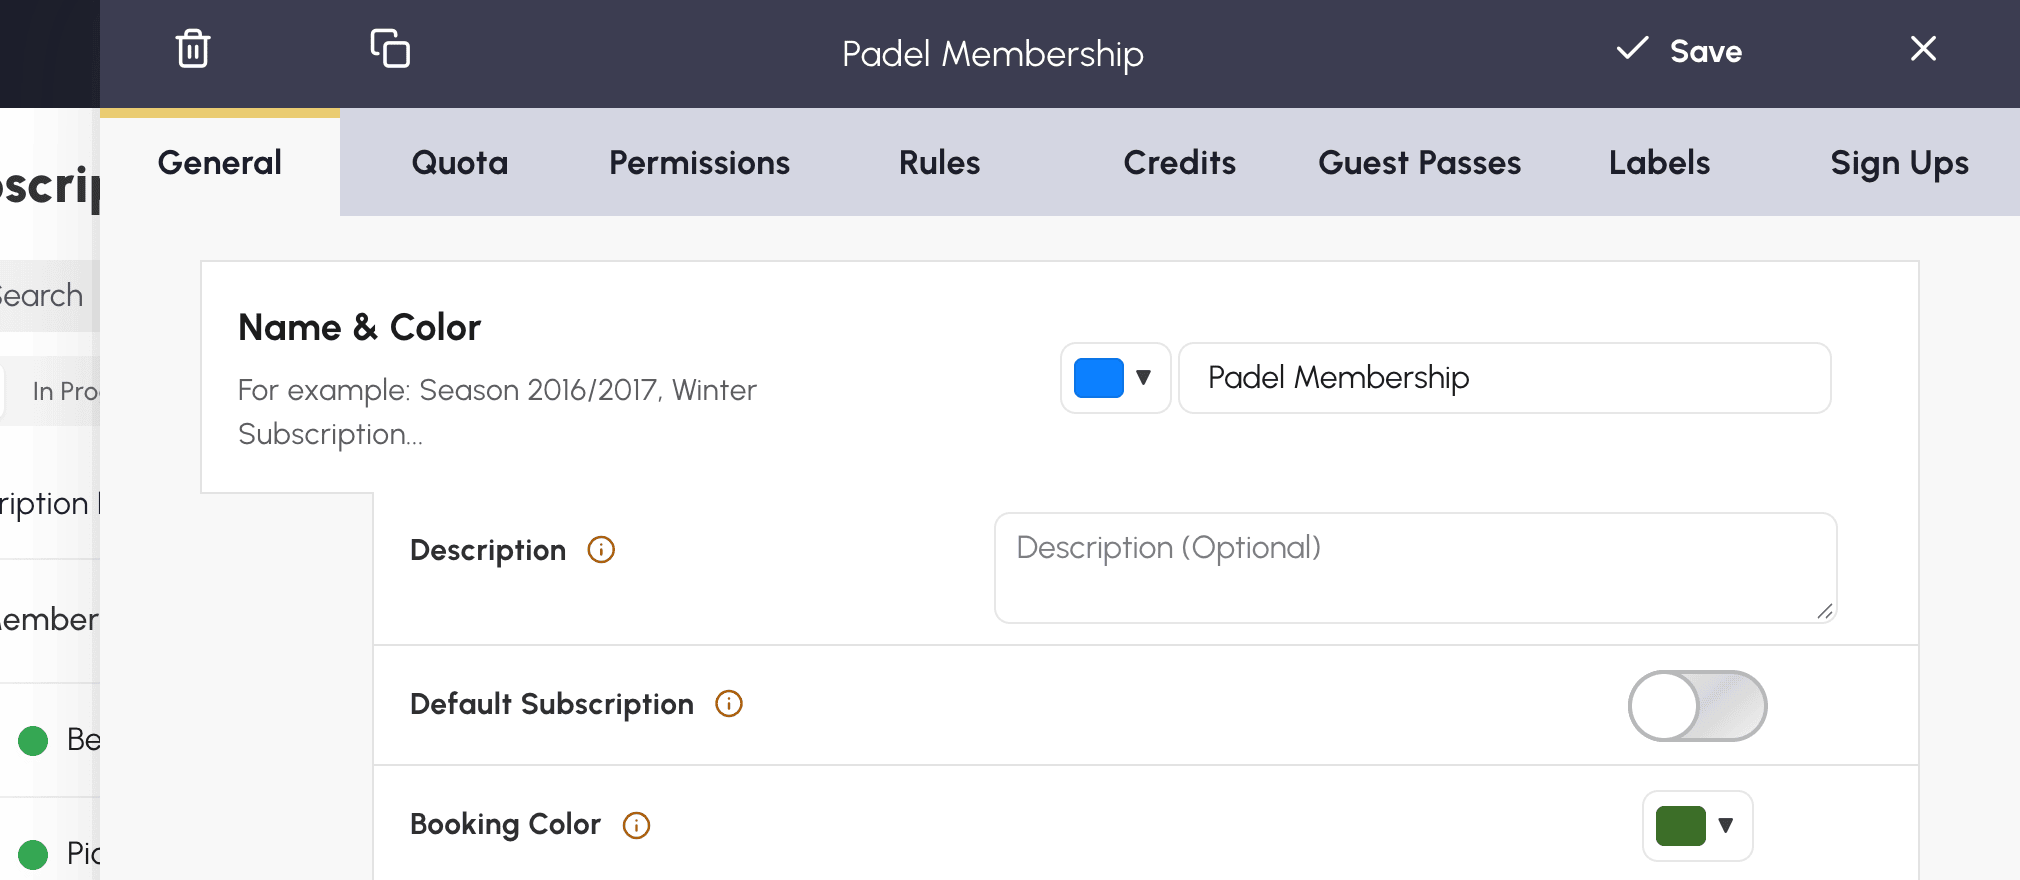
- In the General tab, fill in Name & Color and an optional description.
- Under Access Rights Opening Dates, set the period during which subscribers can log in. Leave the setting disabled for access with no date limit.
- Click Save.
Then complete the booking conditions: how many bookings can a subscriber hold at the same time, which courts can they access, which rules must they follow? The Quota, Permissions and Rules tabs let you specify these choices. The guide below walks you through their configuration.
Organizing the list automatically
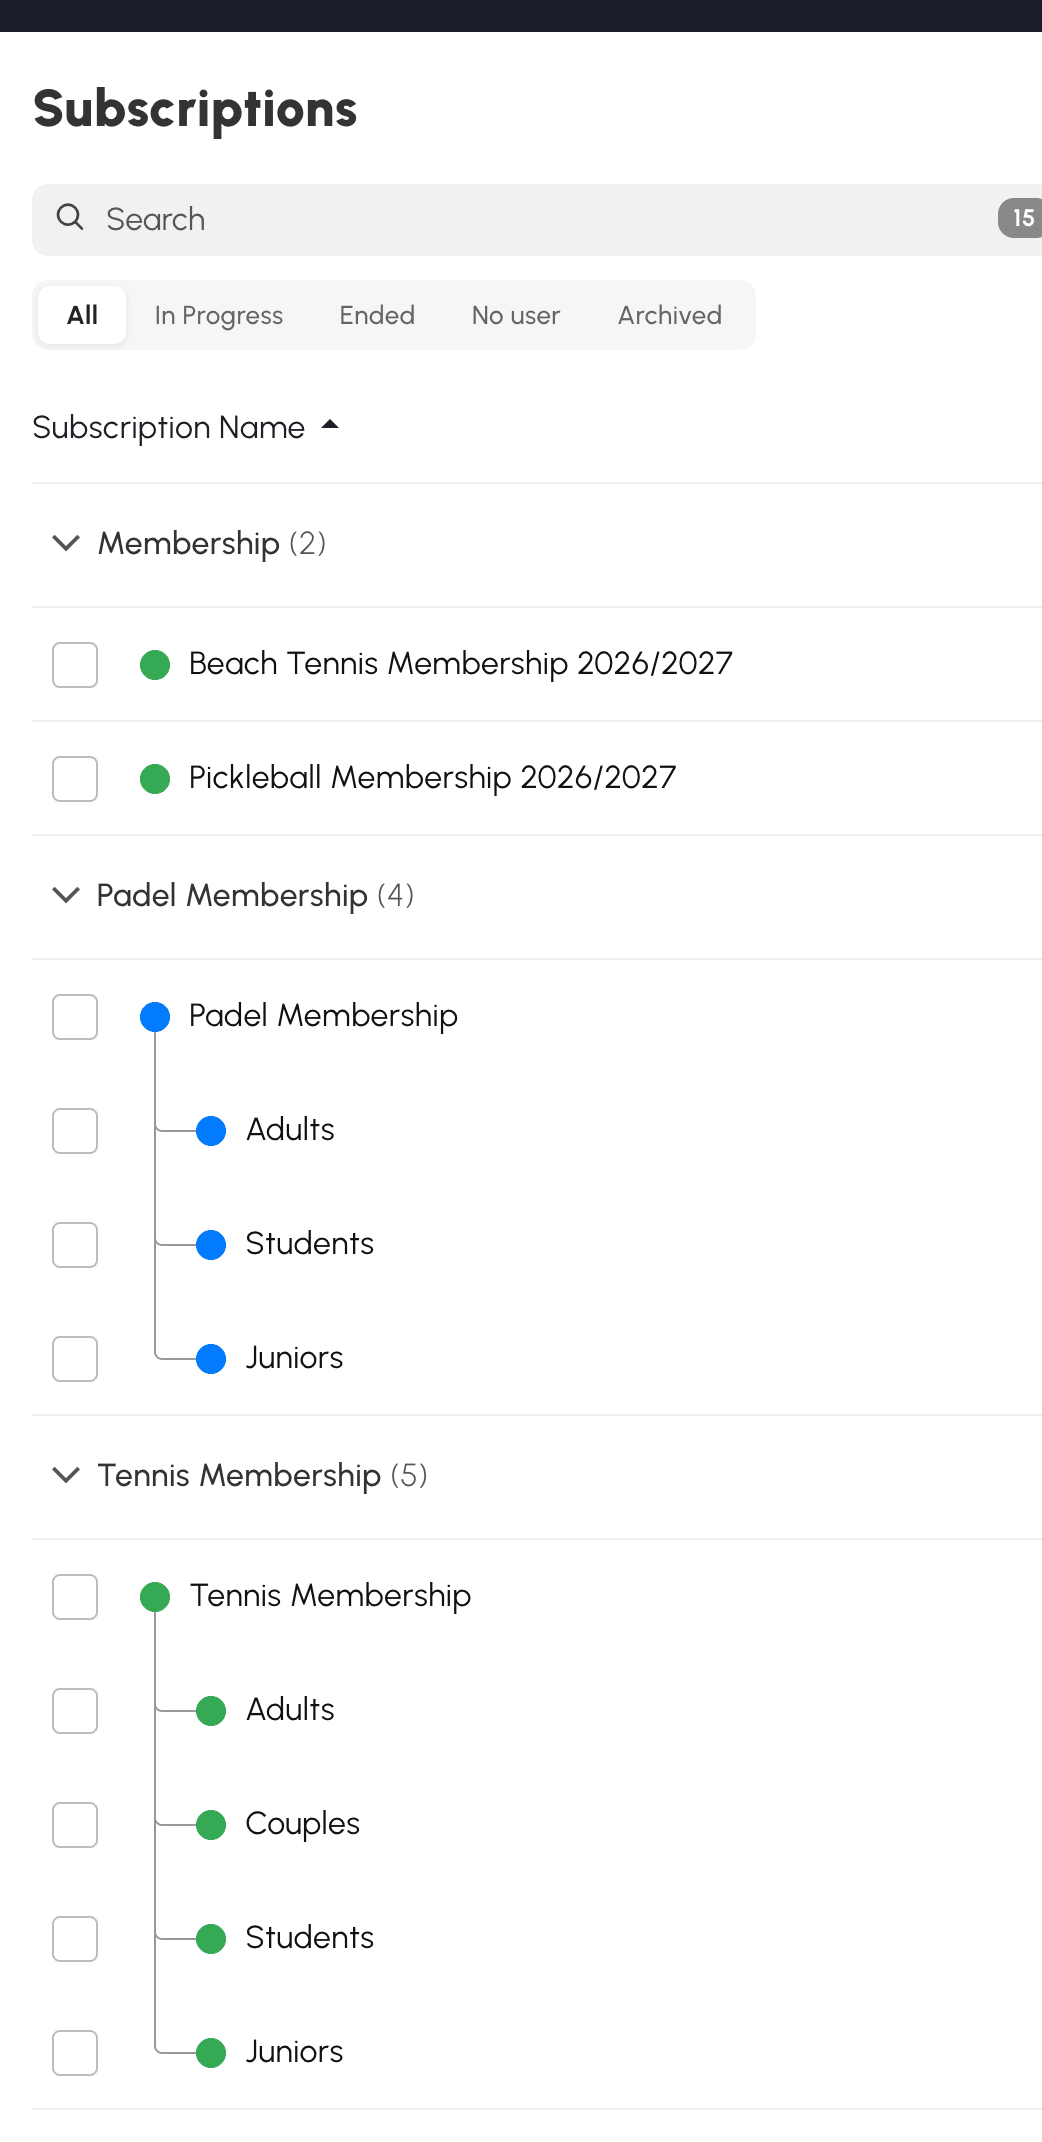
The Automatic mode organizes the list for you: you have no group to create. Click the header of the name, start date or end date to choose the sorting. The groups adapt to this choice, without modifying the subscriptions.
With sorting by name, the application looks for shared words and seasons. It can therefore bring together Recreational tennis 2026/2027 - Adults and Recreational tennis 2026/2027 - Juniors. Consistent names make this classification easier. If the titles are very different, the application has fewer clues to group them. With sorting by date, the groups are built from the start and end dates of the subscriptions.
Click a group title to collapse or expand it. This state is saved for your account.
Arranging subscriptions in manual groups
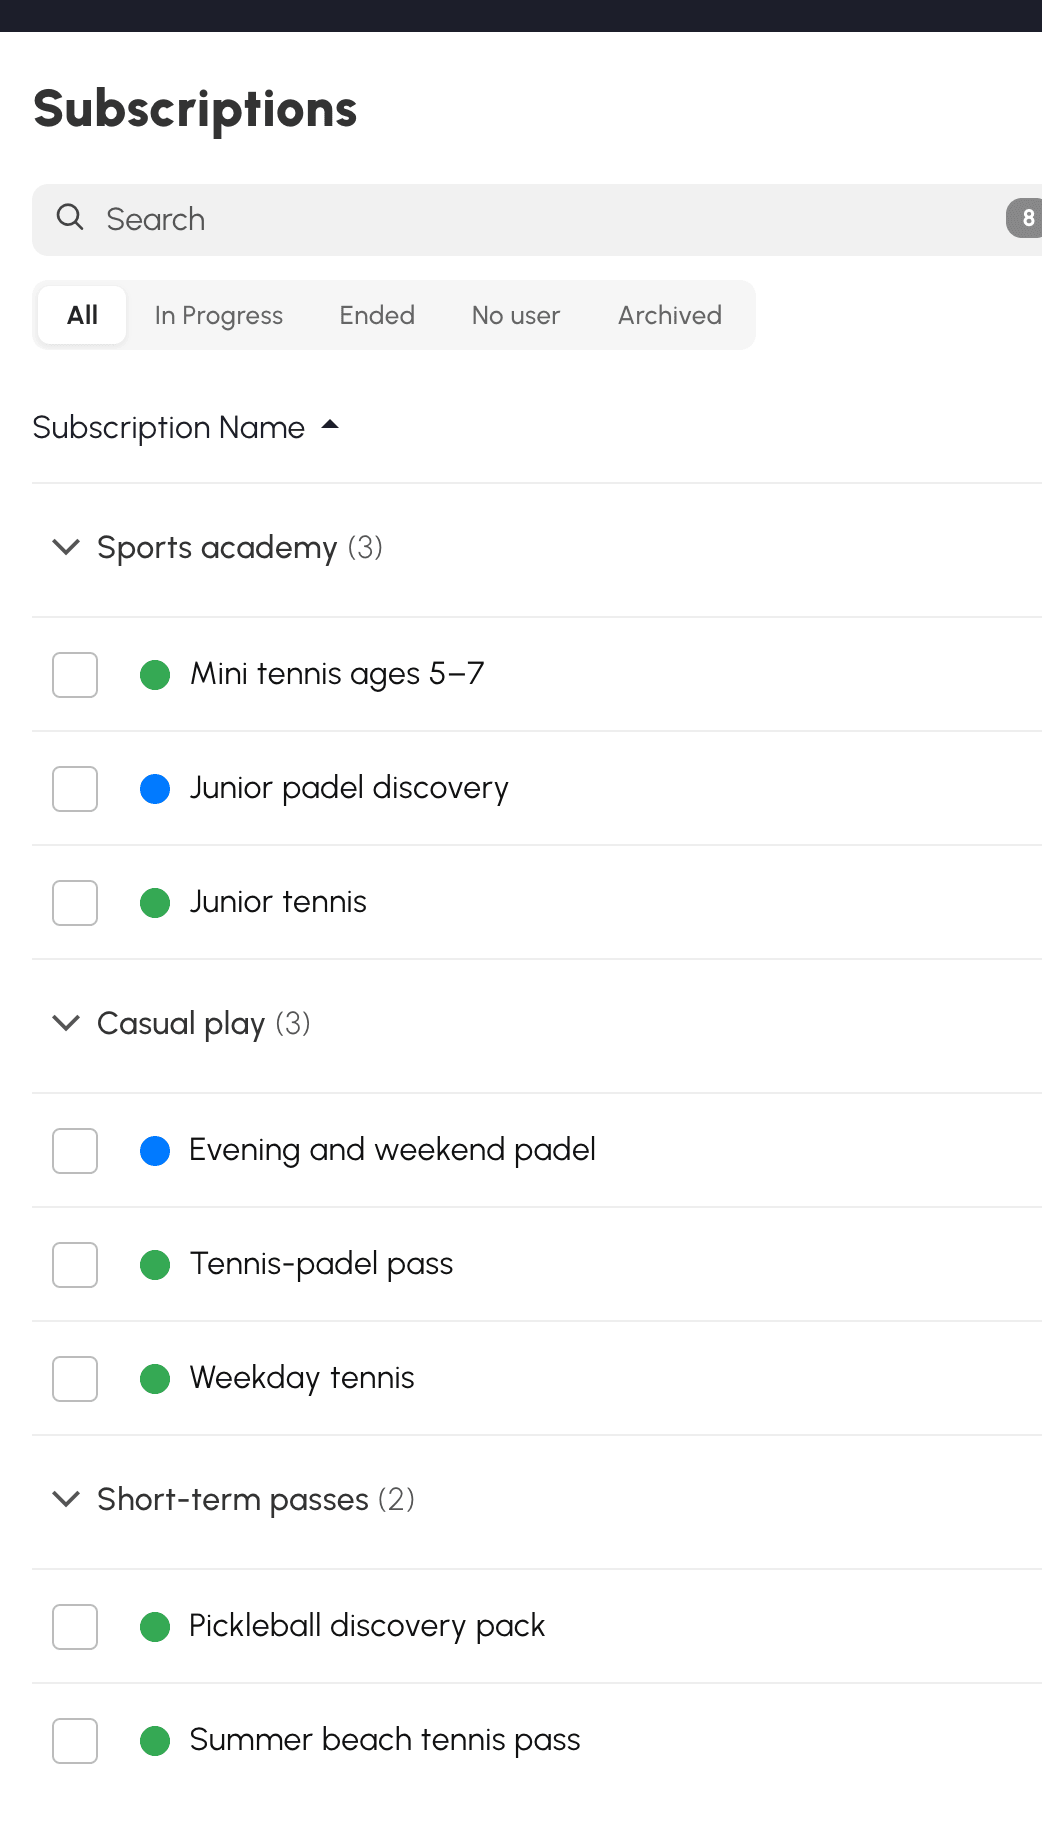
Choose this mode if you want to organize the list according to your own criteria. You can, for example, bring tennis and padel together in a Sports school group, then separate free-play subscriptions and one-off offers, whatever their names.
- Switch to Manual groups.
- Click Add a group and give it a name: the new group appears at the top of the list.
- In All, with no search or filter applied, drag the rows to arrange them in the groups and set their order. On a touch screen, press and hold the row before moving it.
- Drag a group title to change its position. Subscriptions that are not placed in any group remain at the bottom, under No group.
When you hover over the title, buttons let you rename or delete the group. Deleting a group keeps its subscriptions, which move back into No group.
You can also click a column header to sort the subscriptions by name or by date within each group. If you then move a standalone or reference subscription, your arrangement takes over from the sorting: the chosen position is kept.
Linked subscriptions, presented further down, stay under their reference subscription. You can change their order within this family without modifying the sorting of the rest of the list. If you move the reference, its linked subscriptions follow it.
You will also find these groupings in the subscription selection lists whenever they make reading easier. The full subscription names remain displayed there.
Adjusting the display and acting on several subscriptions
Adapt the list to the way you work: read the descriptions, review payments or display more rows on screen. The Settings menu, to the right of New, saves your preferences:
- Show descriptions: adds the description under the name, over two lines at most.
- Show payments: replaces the start date column with the payments column.
- Compact Mode: reduces row spacing and the size of names, buttons and counters.
These options are disabled by default. Long names remain readable over several lines.
The start and end columns only appear if at least one subscription in the filtered list has the corresponding date. To view or modify a subscription, click its name, including on mobile.
Tick the boxes to the left of the subscriptions to act on several rows at once. The Archive, Link, Detach and Delete buttons then appear in place of the mode tabs. The same rights and restrictions apply as for an action on a single subscription.
In manual mode, Move to… places the whole selection in a group. In Archived, Restore moves the selected subscriptions back into the current list.
Sharing settings with a reference subscription
Do you offer several padel plans — adults, juniors, students — with different prices, but the same rules? Without a link between these subscriptions, every change to a quota or to court access has to be repeated in each plan, with the risk of forgetting one.
A reference subscription lets you manage these settings in one place. Create, for example, Padel subscription, then link your plans to it: changes to the shared settings will be applied automatically to all linked subscriptions, while each one keeps its own price and its own information. If some plans need different rules, keep them standalone or attach them to another reference.
Settings are passed on only from the reference to the linked subscriptions, when you save them. Changing the price or the name of a linked subscription therefore has no effect on the reference or on the other subscriptions. You can also assign the reference subscription to users: it remains a full subscription in its own right.
Creating a linked subscription
From the list, the Create a linked subscription button on the reference lets you quickly create a new variant. You can also do this from its configuration:
- Open the subscription that will serve as the reference, General tab.
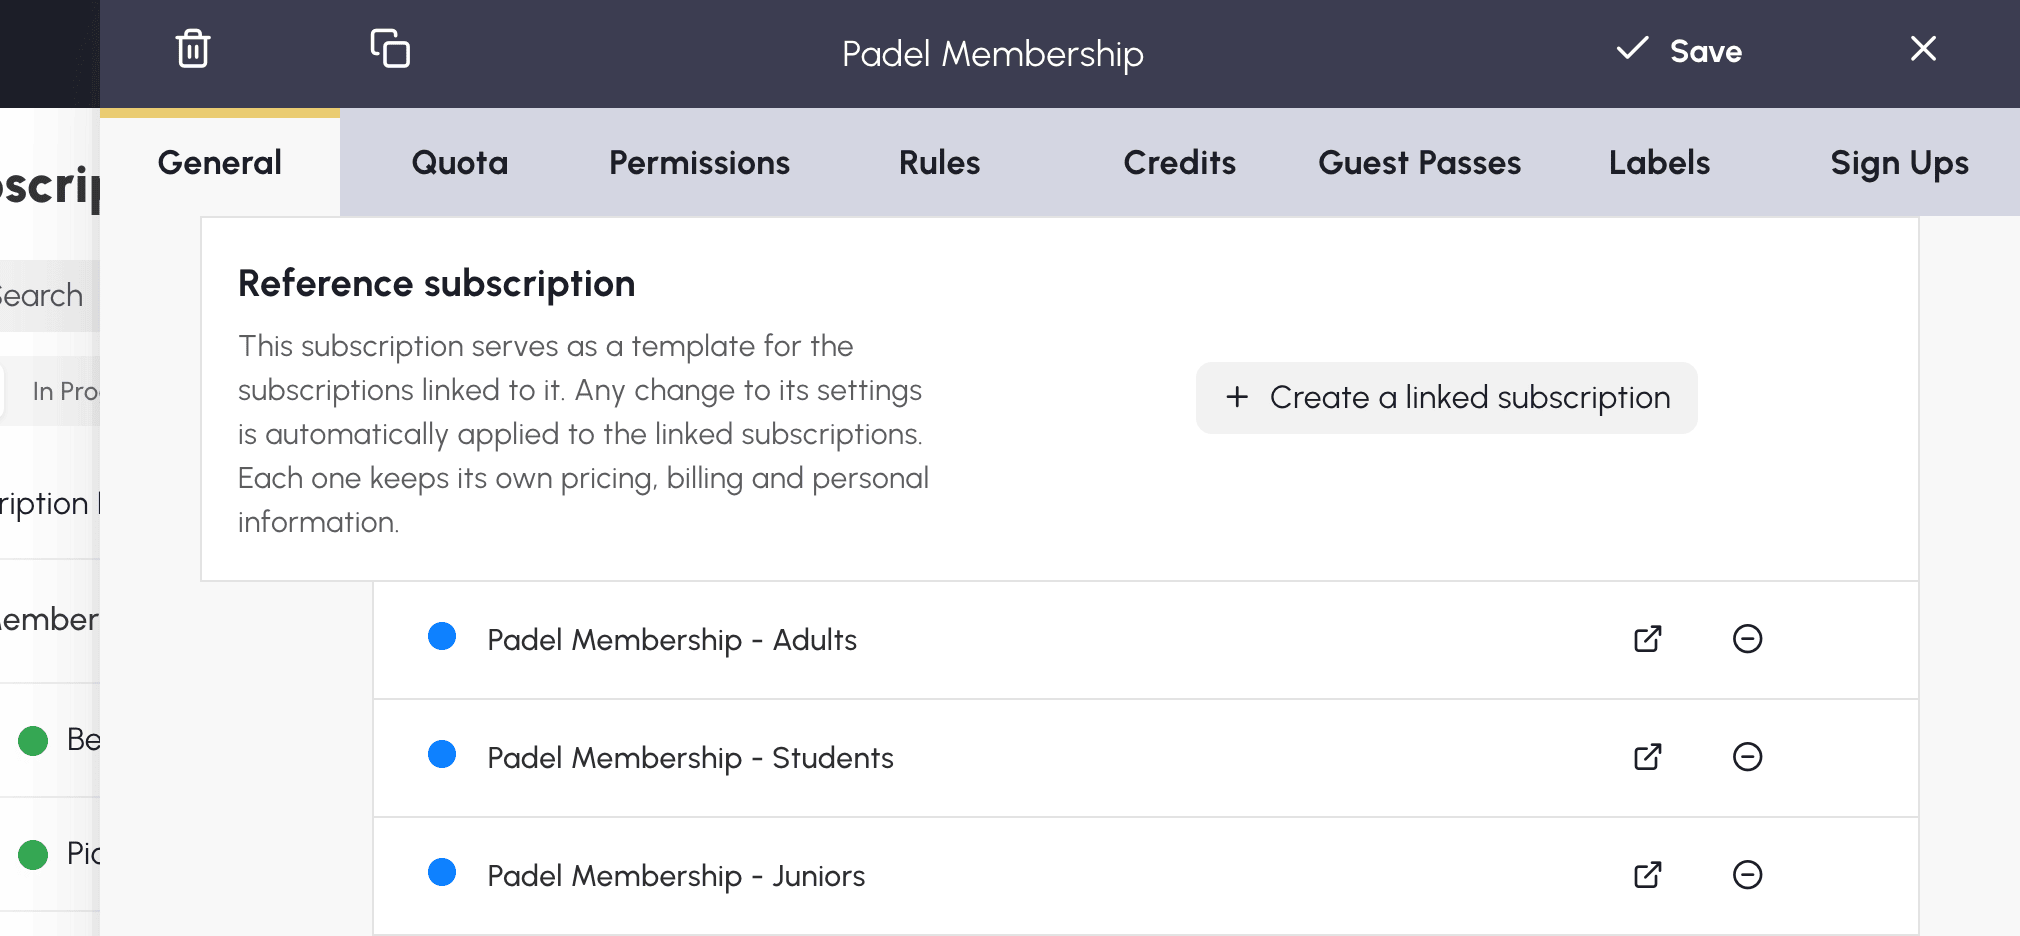
- In the Reference subscription section, click Create a linked subscription.
- Enter the name you want in the confirmation window, then confirm.
- The created subscription appears in the reference's list of linked subscriptions. Click its Open button to customize its name, its price and its other specific information.
Linking an existing subscription
- Open the subscription to be linked and first save any changes you have made.
- In General, Reference subscription section, choose the reference you want.
- Read the confirmation carefully: it states how many users are affected. By confirming, you replace this subscription's shared settings with those of the chosen reference. Its price and its own information are kept.
A subscription cannot be linked to a reference and serve as a reference for others at the same time. You therefore cannot choose an already linked subscription as a reference, nor link to another reference a subscription that already has linked subscriptions.
Knowing where to modify the settings
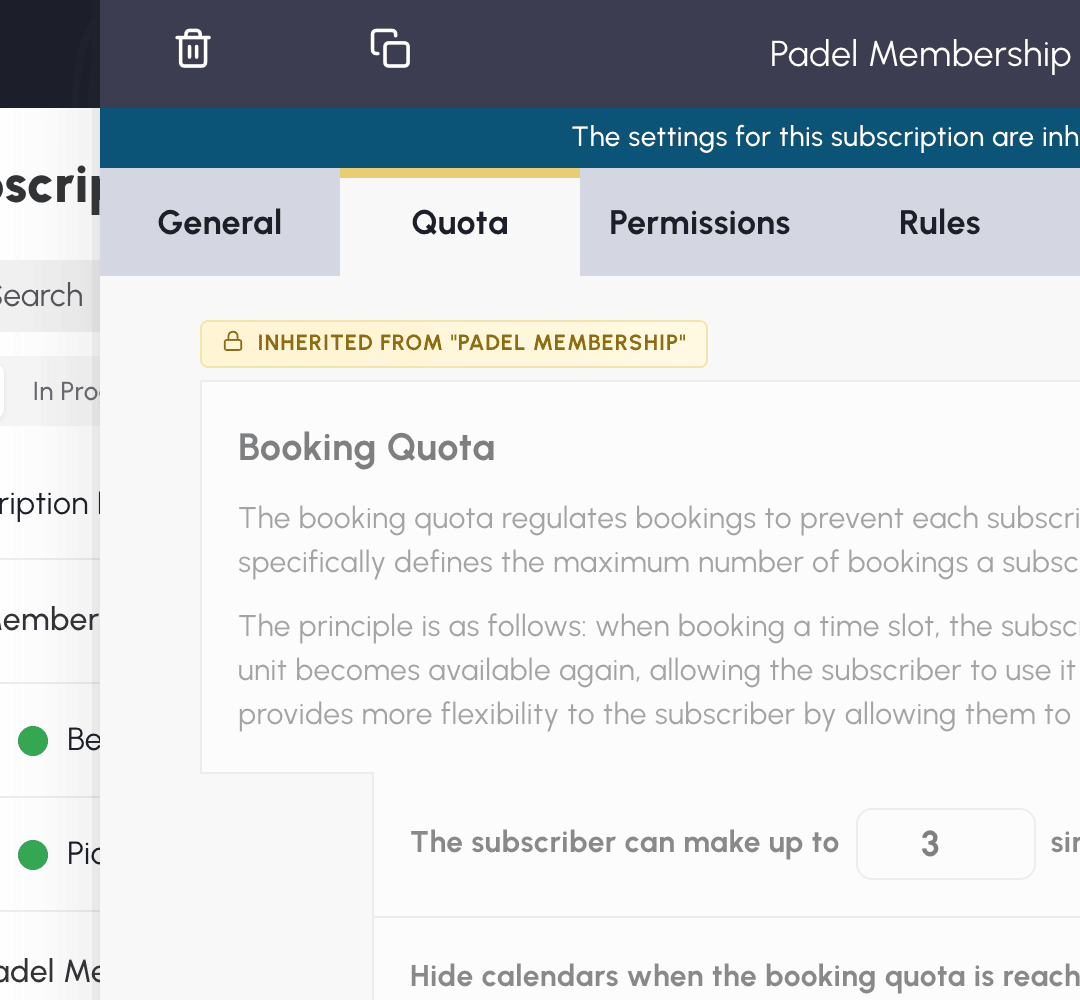
In a linked subscription, the banner at the top of the panel indicates which reference the settings come from. Inherited settings appear greyed out, with the name of the reference. To modify them, open that reference: the change will apply to all its linked subscriptions.
The following remain customizable for each linked subscription:
- its name, its description, its colour and its keywords;
- its dates and its booking colours;
- its prices and its billing, including the prices and the sale of booking credits or guest credits;
- the options in the Sign Ups tab.
The other settings are inherited: quotas, permissions, rules, labels, how credits and guests work, information required in order to book, blocking in the event of unpaid amounts and reminders before expiry.
For example, you can set the junior price at €160 and the adult price at €320. Each one keeps its price, even when you modify the shared rules on Padel subscription.
In the list, a line connects the dots of the linked subscriptions to that of their reference: you can therefore spot the plans that share the same settings. If their name begins with that of the reference, only the rest may be displayed: Padel - Juniors becomes Juniors under Padel. The full name is kept and can be seen on hover.
Detaching a subscription without deleting it
From the reference card, use Detach on the row concerned. You can also choose None in the Reference subscription field of the linked subscription, then confirm.
Detaching only removes the link: the subscription and its users are kept. The inherited settings stay as they are at the time of detaching and become editable directly on that subscription. Changes made afterwards to the former reference will no longer be applied to it.
To detach several subscriptions at once, tick them in the list then use Detach, depending on your management rights.
Tracking membership fee payments
If you collect membership fees at the front desk or by bank transfer, you can record the payments to know who has paid their subscription. In the General tab, fill in Subscription Fee: the Paid Subscription box on each record lets you record the payment, its date and its amount.
To review all users, open Administration›Users›Access Rights›Subscription Tracking. You can filter the list by subscription or by payment status, then export it in Excel format.
If needed, enable Block bookings if the user has not paid their subscription: a banner then appears on the user's record, and booking is refused until the payment is recorded.
To avoid having to monitor this screen, enable the activity reports: each month they send you the named list of subscriptions expiring within 30 days.
Selling the subscription online
Enable Payments & Billing in the General tab to make the subscription payable online: users can take it out or renew it according to the configured plans, with automatic invoicing. Payment is made using the payment methods of the associated billing account.
When this section is active, the dates take on a different meaning: they become Default Access Dates, applied as long as the subscriber has no current plan. As soon as they buy a plan, the plan's dates take over.
Automatically reminding subscribers before expiry
Reminders prompt users to renew their subscription before losing their access to bookings. Three e-mails are scheduled before the expiry date: 30 days before, 7 days before, then the day before.
To view the setting, go to Administration›Users›Access Rights›Subscriptions, open the subscription concerned, then the General tab, Automatic reminders before expiry section. Reminders are enabled by default. For a linked subscription, this setting is modified on its reference subscription.
Adding a personalized message
Under the switch, an editor lets you add a few lines that will be included in the e-mail: date of the general meeting, next season's price, registration desk hours, the address of a form to fill in, an attachment, and so on.

What the subscriber receives
The e-mail recalls the subscription concerned, its expiry date and the number of days remaining, then your message if you have entered one.
A renewal button appears if the user has access to a subscription they can buy online from their account. Otherwise, the e-mail only contains the reminder and your message: remember to explain there how to renew by other means.
Who does not receive a reminder
- Subscribers with no expiry date filled in on their record: without this date, the application cannot schedule a reminder.
- Subscribers whose subscription has reminders disabled.
- Suspended subscribers.
- Those who have disabled Payments & Billing notifications in their account.
Requiring supporting documents in order to book
In the General tab, the Mandatory information for booking section requires subscribers to complete certain information before they can book: e-mail address, postal address, telephone, profile photo, date of birth, ranking, licence number, proof of address or medical certificate.
The user is prompted to complete their record from their first login, then when they click a free time slot. If you enable Apply this restriction when the subscriber is a partner in a reservation, they also cannot be added to another person's booking as long as the requested information is missing.

Duplicating a subscription for the new season
Duplication saves you from starting from scratch: reuse the configuration of a previous season, then adjust the dates and options of the copy.
- In the list, click Duplicate on the row of the subscription to reuse.
- Enter the name of the copy in the confirmation window, then confirm: it appears in the list.
- Click its name to adjust its dates and the necessary options.
You can also duplicate from a subscription's configuration panel. In that case, the copy's panel opens directly after confirmation.
Duplicating a linked subscription keeps its link to the same reference if you have the necessary rights on it. It does not create a new reference for the following season.
Archiving subscriptions that are no longer needed
Archive an old plan to lighten the list without deleting the subscriptions of the users who still hold it. You can therefore put away a past season without waiting for all users to change plan.
Click Archive in the list, then confirm. The subscription moves into Archived. It is no longer offered as a new choice when adding or modifying a user; those already subscribed to it keep it.
A banner may suggest subscriptions to archive. Check the selection before confirming. If you click Hide, only the banner disappears, and this choice is saved for your account: no subscription is archived.
The default subscription cannot be archived. To archive a reference, you must also archive its linked subscriptions that are still active: select them together with it in the list.
To bring a subscription back into the current list, open Archived and click Restore. If you restore a linked subscription whose reference is archived, that reference is also restored, subject to your rights.
Archived subscriptions remain available for subscription mapping during standard and ADOC imports.
Deleting an empty subscription
Delete a subscription if you no longer need it and no user is attached to it. If it is still in use, archive it to remove it from the list while keeping it for its subscribers.
Use Delete in the list or in the configuration panel. Deletion is refused if the subscription still has users, if it is set as the default or if it is that of the logged-in administrator. The same protections apply when you delete several subscriptions at once; the message then offers archiving.
Deleting an empty reference detaches its linked subscriptions: these are kept with their current settings. To remove only a link, use Detach, without deleting the subscription.
Reassigning a subscription in bulk
At the start of a season, you can assign the new subscription to several users in a single operation, without opening each record.
- Go to Administration›Users›User Management and select the users concerned, or Select All after applying a filter.
- Open Actions then Quick Edit.
- Choose the new subscription and, if needed, its dates, then click Save.
During this same operation, you can mark the subscription as unpaid for the selected users, for example at the start of a new season.
If you prepare these changes in a file, you can also use the import to update the subscriptions of the users concerned.
